{DIY} Lowboy Dresser

I thought it took me a long time to finish the tall boy, but doing the lowboy only took a month less to do.

Here's a reminder of what the tall boy looks like now:

And here's the lowboy while it was in the basement guest room:


If you look at the first picture, you might notice that the mirror frame and dresser are different colours. That's because my dad made the frame for the mirror and attached it himself. I guess that's where I inherited my curiosity for DIYs eh?

Here's my dad removing the mirror so that I could paint the dresser.

After 3-4 coats of Swan Wing by Behr,  here's the lowboy!


I actually used a roller for two of the larger drawers because the brush kept getting too streaky and I didn't want 6 layers of paint on it. I used a paint brush for the rest of the lowboy so in person, if you look closely, it's a little mismatched but it doesn't bother me too much (at the moment).

I wanted to use Floetrol for the dressers so that the paint would be more fluid and less likely to be streaky, but this one man at Home Depot told me not to and has since given me bad advice another two times! Because I regretted not getting Floetrol the first time, I didn't listen to him the other two times though. I really should learn to find someone else, but it seems like every time I go to that location, he's the only one around the paint department!


The lowboy is shinier than the tall boy because I used a small foam brush to cover it in 2 thin coats of Minwax polycrylic but since it dries so fast, it's a bit streaky on top as well. Again, this doesn't bother me so much right now as it's only noticeable in certain angles of light.

What DOES bother me is the little fibres and dust particles that landed while the paint and polycrylic were drying, but I'll live with it since I'm not going to ruin it by trying to sand out those bits. I already accidentally scraped off a bit of paint trying to get one little fibre off and painting over it looked worse.


I used the same black spray paint as well, but it came out a lot grittier. It's supposed to be satin, but it seems more matte. Maybe I just didn't shake the can enough?

Two dressers done and one more to go (my old one which will go into the guest room), but I'm going to apply some polycrylic to the tall boy as well. I've been too scared to put anything on top of it. I put a vase on it for one day and I felt like it was starting to damage the paint so I've only been putting light things on it. I'll probably add another coat on the top of the lowboy while I'm at it too, just to get 'er all done at once.

Now that I've finally painted this, I can finally organize my closets again. They're a bit chaotic at the moment...

Linked to: Primitive & Proper

What happened to summer?!

Yikes! I haven't been keeping up with blogs (mine and everyone else's - Google Reader says I have almost 1000 posts to read!) and it's almost September! I have not done nearly as much around the house as I expected to, but much of my free time at home lately has been spent trying to get this baby (and myself) up to speed.


It's a little birthday gift to myself since my last laptop (which was really my first) was bought in the spring of 2004! I'm surprised my p.o.s. Dell has lasted 8 years! I did have to replace the hard drive in 2006 after a virus wiped it out and I could no longer bear with the blue screen of death though. But recently I was starting to have issues with the hard drive again and I was long due for a new computer so I went and bought myself a new toy!

The Dell is twice as thick as the Mac! Seriously this thing is a monster.


I am slowly transferring photos but trying to sort them into a more organized and logical manner than before is difficult since I'm a Mac newbie. I installed Evernote but I don't get what it's for, I'm not sure my Messages is set up properly, but at least I'm picking up using the touch pad a lot quicker than I expected. With the Dell I absolutely have to use the mouse because the track pad is terrible.

I'm still going back and forth between both computers, but hopefully I will fully transition to the Mac soon. I just have to plug in my camera/memory card to see which method is going to be best for uploading photos and then maybe I can get back into the swing of things!

I hope everyone has been enjoying their summer! And enjoy what's left of it! *sigh*

{At Home} Powder Room Update & Lighting

Whoops. Totally dropped the ball on this one again! Just a little update on the powder room progress (and current lack thereof).

We last left off here with the sink bowl on the kitchen table and the old light fixture.


Instructions. All gibberish to me!

As a reminder, here's the old screechy faucet.

My dad's makeshift set-up to hook all the plumbing back together...

And now the sink is all put back together after some minor cosmetic alterations!

Shiny!

And not screechy at all! I still cringe every now and again when I turn the tap on, expecting it to scream at me.

After this was installed, every time I walked by the powder room I would walk in just to stare lol.

So we crossed off one more item on the to-do list...
  • Paint stripes on the walls
  • Paint the baseboards
  • Replace the toilet
  • Re-hang old mirror
  • Finish installing the new faucet and reattach the sink bowl to the wall
  • Touch up the paint around the sink (Miraculously, it needed no touch ups!)
  • Buy a new light fixture and install
  • Find two pieces to fill the frames and hang them up (I've got one potential, I just need a second)
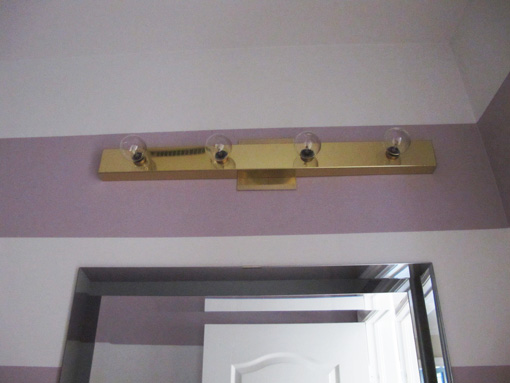
The light fixture is still this 80's style Hollywood bulb type. We just haven't found any light fixtures that catch our eye (and don't break the bank) as you can tell by all the other light fixtures in the house...

The master bathroom had a boob light that we removed back in February and it still looks like this...

Gotta love the builder's standard light fixture...

We bought this Martha Stewart fixture (Seal Harbor) to see if we liked it so then we would buy the 1- or 2-light version for the powder room. So far so good, though we have 60 watt bulbs in them now and it gets really warm standing under them even after 10 seconds. I keep meaning to switch to a lower wattage but again, hello, I am lazy.

I'll eventually post about the updates made to this bathroom (and all other rooms...).

So last year I switched out the overhead light in my bedroom and it made a world of difference! Below is the standard builder one from over 20 years ago!
Yuck. This is the one currently in my brother's room. We've yet to decide what to switch his out for.

I switched the standard to this Hampton Bay one, I believe it was $30? After about 2 weeks, I realized that the wallmount lights in the basement are the semi-circles version of this! I'm not sure my parents have even realized yet.

We originally bought this light for the spare bedroom upstairs (now turned "library" and my second closet), but somehow it ended up in the master walk-in closet instead.

And so the light in the spare room looks like this now. Also since February...

I suppose I should start keeping an eye out again for light fixtures and just get 'er done! I just want to finish all the bedroom/bathroom stuff so that I can get started on the family room and kitchen!

Is anyone else as bad as me with all the jumping around with projects? I seriously cannot focus to get them done in a reasonable amount of time...

{DIY} Michelle's Bridal Shower

So you saw the decorations and towel cake I made, now here's the final product!

We were running around like chickens with their heads cut off, trying to get everything set up before people showed up and we still started half an hour late. Oops! Running between the parking garage, apartment, and party room while also waiting for the elevator really sucks up a lot of time! Next time if I were to use a condo party room again, I would definitely allocate more time beforehand in the party room to set up.

Aside from that, I think it went pretty well and I hope everyone enjoyed themselves!

As guests walked in, they were greeted by a little pom pom.

Sparkling Citrus Punch, Oreo Chocolate Chip Cookies, Peanut Butter Chocolate Cupcakes (with my paper flags), and chips & guacamole.

Angus Beef and Chicken Sliders with the food picks I put together. And there's one of the three large green pom poms. I didn't have time to fluff them properly...

Yay, food!

The guests waiting for the party to get started! You can see how badly I fluffed the green pom pom on the left...

We asked the guests to write a message or leave Michelle some advice which we would use to compile a little book for her new life as a Mrs.
The first activity.

Guests filling up their plates!

On paper I felt like we had no food. In actuality, there was A LOT!

We came up with a list of questions and sent them to both the bride and groom to answer on their own. Then Mandie picked the more ambiguous answers and guests had to guess whether "He" said it, if "She" said it, or if they both said it!
"He Said, She Said".

It was hard getting the moms and aunts to pay attention! They're a chatty bunch!

The young crowd paid attention!

For the second game, a list of items were allotted points and if you had that item, you got the corresponding points. The person with the most points won. And you bet Mandie did surprise "audits"! We had to make sure that they actually had what they claimed to have! Some people (Michelle) claimed to have a hair brush but couldn't prove it because it wasn't there!
Tallying up points for the "What's In Your Purse?" game.

The girls checking what they have in their purses.

Some of the resulting advice/message cards. No clue what that says...

For the little "photobooth", the original plan was to use a white table cloth behind so that the blues and greens would pop... buuut, the plastic of the table cloth kept sliding out from the tape so that was a bust.
The paper dot garlands hung up!

Bridesmaids with the bride! We've known each other for half our lives! (Well, Fi and I have known each other longer...)

Michelle and her bouquet of gerber daisies.

Group shot, though we did lose some people before this.

Gift time!

Kathy monkeying around with the paper dot garlands.

I love this picture. Michelle's grandma is watching Kathy play with the garlands, probably wondering who the crazy girl is!

Michelle and the two moms.

Forget the veil and floral bouquet, I think this is the look to use on wedding day!

Now that both the bachelorette and bridal shower are done, it's time to get cracking on some of the stuff needed for the wedding! Only two months to go!
What about you? Anyone else helping out with wedding festivities this year? Or attending many weddings?

{DIY} Bridal Shower Prep

After all the bachelorette fun, it was time to get working on the bridal shower for Michelle. She wanted a simple gathering with family and close friends so I got started on the decor to jazz up the party room.

A few months back I saw Oh Happy Day's Jordan's tutorial for Paper Dots Garlands and loved them, but wasn't sure where to buy crepe paper folds so I thought nothing more of it. Then I was browsing the aisles of Dollarama and spotted these 10 metre rolls of crepe paper in the green theme that we wanted (they also had packages of pinks/purples and yellow/orange/red). They weren't stretchy like regular crepe paper but they were already pre-cut and they did the job.


I followed these steps and it probably took me about an hour (in front of the tv of course) to do each roll.
Paper Dots Garland tutorial and images by Oh Happy Day.

My finished garlands!

We planned for a little photo op with the bride-to-be and these garlands were to be the backdrop.

Up next? Tissue paper pom poms! Seriously, these days you can't have a bridal shower without some tissue paper pom poms! I consulted the millions of tutorials already online to make 3 large green pom poms.
Tissue Paper Pom Poms tutorial and images by Martha Stewart.

These are so easy to make, I'm always so curious as to who buys the pre-cut packages. Aside from Martha selling them, I was at Michael's and saw another company's package of 6 in the bridal aisle selling for $29.99! That's crazytown! Our green pom poms were essentially just $1 each for each pack of tissue paper and I used other materials I already owned - instead of floral wire I used twist ties and just used some thread for the string.

I made two smaller blue ones with tissue paper I already owned since we had three large bright green ones and I figured it'd be nice to break up the colour a little bit.
The view from below. I used 8 sheets for the dark blue pom pom and 10-12 sheets of tissue paper for the light blue pom pom. I like the fuller pouf a lot more.

We planned to serve some sliders and needed some toothpicks to keep the buns and meat together. We tried looking in stores for some pretty toppers but couldn't find anything that wouldn't break the bank so I decided to make my own.
Food Picks tutorial and images by Studio DIY.

I used a similar process as Studio DIY. Instead of tissue paper I used a roll of crepe paper I already owned. Because the crepe paper was 2" wide, I cut 3-4" inch sections and folded the crepe paper in half so they would be an inch long, cut the fringe, and then dabbed beads of glue to wrap around each toothpick.
Crepe paper food picks.

We also wanted some cupcake toppers and I wanted different ones from the sliders. I wish I had washi tape because this would've been so much easier. Instead I cut up some blue-ish paper I already owned (thicker than printer paper but thinner than cardstock) into flags and poked two holes at the ends to thread the toothpicks through.

For the gift, the bridesmaids bought bath and hand towels and I constructed a towel cake out of them. To top the cake off, my mom made some wash cloth puppies.
Pretty from the front.

Hot mess in the back lol.

I used a paper towel roll to create a fuller base and so that I could wrap the towels for the top tier around instead of using pins to attach them to the base.

The profile of the towel cake. It's more padded at the front because of how I needed to fold the towels to show the monograms.

Do you have any "must have" party decor items? Have you made anything you've pinned or been inspired by on other blogs lately?

Come back Thursday to see how it all came together!