Showing posts with label Paint. Show all posts

{DIY} Lowboy Dresser

I thought it took me a long time to finish the tall boy, but doing the lowboy only took a month less to do.

Here's a reminder of what the tall boy looks like now:

And here's the lowboy while it was in the basement guest room:


If you look at the first picture, you might notice that the mirror frame and dresser are different colours. That's because my dad made the frame for the mirror and attached it himself. I guess that's where I inherited my curiosity for DIYs eh?

Here's my dad removing the mirror so that I could paint the dresser.

After 3-4 coats of Swan Wing by Behr,  here's the lowboy!


I actually used a roller for two of the larger drawers because the brush kept getting too streaky and I didn't want 6 layers of paint on it. I used a paint brush for the rest of the lowboy so in person, if you look closely, it's a little mismatched but it doesn't bother me too much (at the moment).

I wanted to use Floetrol for the dressers so that the paint would be more fluid and less likely to be streaky, but this one man at Home Depot told me not to and has since given me bad advice another two times! Because I regretted not getting Floetrol the first time, I didn't listen to him the other two times though. I really should learn to find someone else, but it seems like every time I go to that location, he's the only one around the paint department!


The lowboy is shinier than the tall boy because I used a small foam brush to cover it in 2 thin coats of Minwax polycrylic but since it dries so fast, it's a bit streaky on top as well. Again, this doesn't bother me so much right now as it's only noticeable in certain angles of light.

What DOES bother me is the little fibres and dust particles that landed while the paint and polycrylic were drying, but I'll live with it since I'm not going to ruin it by trying to sand out those bits. I already accidentally scraped off a bit of paint trying to get one little fibre off and painting over it looked worse.


I used the same black spray paint as well, but it came out a lot grittier. It's supposed to be satin, but it seems more matte. Maybe I just didn't shake the can enough?

Two dressers done and one more to go (my old one which will go into the guest room), but I'm going to apply some polycrylic to the tall boy as well. I've been too scared to put anything on top of it. I put a vase on it for one day and I felt like it was starting to damage the paint so I've only been putting light things on it. I'll probably add another coat on the top of the lowboy while I'm at it too, just to get 'er all done at once.

Now that I've finally painted this, I can finally organize my closets again. They're a bit chaotic at the moment...

Linked to: Primitive & Proper

{At Home} Powder Room Progress - Finally!

Holy smokes. This month is going to be a slow month for me on the blog! If I'm not at my day job during the week, I'm going to be at my part-time on weekends (or NYC one weekend) so home projects will be slow! SlowER, I suppose. This potentially means more horrible night time photos because I'm never around during the day. At least I finished organizing my clothes on hangers, but I kept more than I should have and I still have to go through my dresser...

But! A little progress is being made in the powder room!

We last left off with the painted stripes on the walls and no toilet, but now the toilet is installed (pictures to come later since the powder room is a bit of a mess right now).

The yellow baseboards are no more! They're now a nice glossy white to match the door and door frames that we painted a few months earlier.

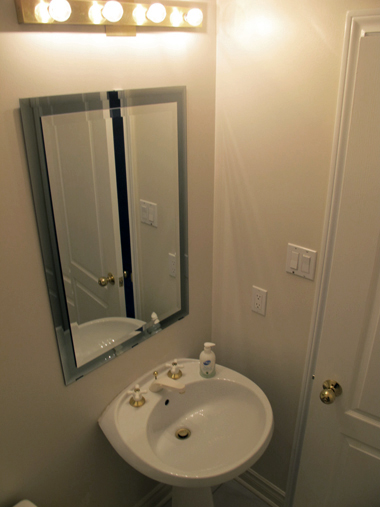
Finally, 2.5 months later we are switching out the faucets! This faucet screams bloody murder when you turn it on, unless you turn it on full blast, but we always forget to tell guests this so then they get scared while using it and keep it on really low so that it's a mere screeching sound. Either way, it's annoying and we are long overdue for a new set.

We bought Moen's Thea model soon after I finished painting, but got sidetracked with painting the upstairs bathrooms so that we could put the new toilets in those as well.

My dad got started while I was at work and I came home to this:

After removing the pedestal from the base, my dad originally had the bowl propped up with the walker my mom brought home from Barcelona (why? I have no idea), but then removed it and the bowl eventually fell. No damage was done to the bowl but it had to be removed anyway so that the new taps and tubes could be properly configured. Apparently it's a lot more work than my mom or I expected! Not that we're doing any of it...

The bowl is currently sitting on the kitchen table, but everything might be all set up by the time I get home from work again today. I can't wait to use it and not hear it screaming at me!

Here's a look at the to-do list for the powder room:
  • Paint stripes on the walls
  • Paint the baseboards
  • Replace the toilet
  • Re-hang old mirror (we thought about getting a new one but this one is still good)
  • Finish installing the new faucet and reattach the sink bowl to the wall
  • Touch up the paint around the sink
  • Buy a new light fixture and install
  • Find two pieces to fill the frames and hang them up (I've got one potential, I just need a second)

So at the rate we're going, I'll probably update you all again in 2-3 months? Hopefully sooner than that!

{DIY} Tall Boy

Over the years I have accumulated a lot of clothes. In university I used two of these drawers for anything that wasn't hung in the closet (like hoodies, long sleeve shirts, jeans, etc) but I slowly outgrew those.

We had an extra tall boy in the guest room so I decided to take it since I like the colonial style of it. I didn't get a before photo of it but it basically looked like the one below. (My parents have 2 tall boys and 2 low boys, all with different hardware but essentially the same style! I don't know why they were purchased so sporadically in the 70's.)


I don't like painting over wood if it doesn't need to be, but with 4 different furniture finishes in my room, I wanted to coordinate the colours a little better. I spent a lot of time debating between painting it black or white, but I finally decided to paint it white with black hardware.

I only painted the exterior and left the interior wood untouched. Don't mind the mess. I was painting while the hardwood floor installation was happening.
The second coat of four coats of paint.
It's hard to see but the left side is more white while the right side is slightly yellow. Yah... next time I'll have to remember to stir the paint better.
I used an old ramen box to hold the hardware so that I could spray them with Krylon's Black paint in satin finish.
Didn't spray it so evenly... 
There's a little ding near the top in the middle. My dad flipped the hardware over too soon (it had cured for 24hours at this point) and the paint stuck so I had to spray them again and I let them cure for a week instead!

My set up to ensure the handles were sprayed evenly when hung upside down. It was so awkward when people walked past on the sidewalk lol.
Finished product!


Next up, I was planning on painting the extra low boy that replaced the tall boy in the guestroom, but it took me months (May to August) just to finish the tall boy! So this got pushed aside for this coming summer, though now with the condo I don't know if it will fit so I'm not sure if I should bother painting it. I probably will and I'll probably remove the mirror that my dad added and hang it separately.

I used a paintbrush to paint the tall boy, but I'm planning on using a small foam roller for the low boy since I couldn't get much coverage with the paintbrush. Still undecided though.

{At Home} Powder Room Progress

We finally finished replacing the carpeting in the bedrooms to oak hardwood (I hope to have pictures of that within my lifetime...) so then we've now moved onto replacing the toilets on the main and upper floors. But before the new toilets go in, we have to paint the bathroom walls!

After living in this house for almost 24 years, we still haven't really painted most of the rooms aside from the bedrooms, the main hall (which we had the contractors do when we had the basement finished), and the family room which is wallpapered (horrible 90's floral). We're pretty indecisive about the colours since there is absolutely no cohesive look to this house. It's just mish mash of things from before my parents met to new purchases since moving in, as well as taking things in from family when they downsize their homes.

For the powder room on the main floor, I wanted to fancy it up a bit. I thought about doing an accent wall but since it's a small space with no window I realized that stripes were the way to go! It's more interesting to look at and the lighter colour keeps the room a little brighter while the darker colour gives it some oomph! Some of my inspiration photos below:

 One . Two . Three . Four . Five . Six

This is what we've been living with for over 20 years! I took these photos after removing the art from the walls though.


Pardon the terrible lighting in these photos although the walls were pretty yellow anyway. Taking photos at night in a room with no windows is really not conducive to good photos. I tried to fix them but they're too far gone. Ignore the yucky standard light fixture...


I penciled out all the lines before taping, but next time I'm just going to make a few markings here and there. The height of the walls were about 91-92", so I measured out nine 9" stripes and the bottom stripe was about 10", give or take. I'm not sure where the level made up for the crookedness of the walls.


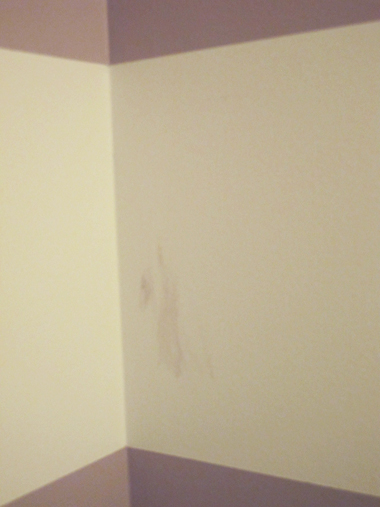
This is where a glob of paint dripped while I was trying to paint the inside edges above. I wiped it down once and it was good, then I wiped again and didn't notice I was wiping with paint. Oops.


And here is where some paint peeled off while I took the tape off. Sad face. The one on the right is blurry, but I touched it up and it's only slightly noticeable now!


The next two photos are oddly yellow.


So I used Behr's Gallery White and French Lilac. The colours are actually a bit more muted than this. I originally wanted grey stripes but somehow we ended up with purple...


Close up shot. I'd say the actual colours are a bit of a mix between the photo above and the one below. I don't know why but whenever I'm in there now, I want to eat candy. I can't even think of any purple sweets.


Luckily the plumbing stuff for the sink landed right in the middle of the second-from-the-bottom stripe so I didn't have to do any weird maneuvering, and then I just taped off the purple stripe so that I wouldn't have to tape and paint behind the hoses.


Up next, I have to paint the baseboards before the toilet can go in. All the baseboards in the house are so yellow when you compare them to the trim that we've already painted in glossy white.


New toilets sitting in the front hall.


Since my mom and I want to replace the old light fixture and get something that's chrome or brushed nickel, the faucet has to go as well, which is fine by me! I hate this faucet. Using the cold water, it screams at you unless you turn it all the way up.


You can kind of see how the faucet part is a bit more yellow than the knobs and sink bowl. I hope it'll be easy to replace since we're keeping the rest of the sink and I don't want to be patching up and repainting the walls.


Painting stripes is tiring! It's taken me 7 days over the last two weeks to get this far since I only do a bit after work/dinner and other nights I'm out or at my part-time gig. But soon we will have a toilet on the main floor again!